TopVision Security Camera Manual: A Comprehensive Guide
This manual provides detailed instructions for setting up and utilizing TopVision security cameras, offering comprehensive guidance on features like ONVIF, RTSP, and AI detection․
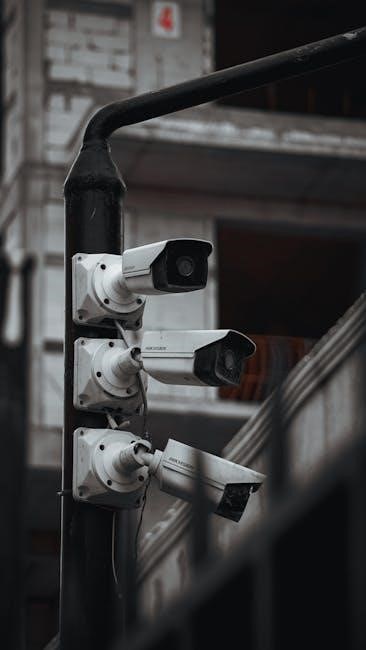
Welcome to the world of TopVision security! These cameras are engineered to provide reliable and comprehensive surveillance solutions for both residential and commercial applications․ TopVision cameras stand out due to their compatibility with widely-used protocols like ONVIF and RTSP, ensuring seamless integration with various recording systems, including iSpy and Agent DVR․
This manual serves as a complete resource, guiding you through every step – from initial setup and network configuration to advanced feature utilization․ Whether you’re a seasoned security professional or a first-time user, this guide will empower you to maximize the potential of your TopVision camera․ Explore features like intelligent motion detection, AI-powered object recognition (people and vehicles), and remote access via the TopVision mobile application for ultimate peace of mind and control․
Understanding Key Features & Benefits
TopVision security cameras boast a robust suite of features designed for optimal performance and user experience․ Key benefits include high-resolution imaging for clear video quality, advanced motion detection to minimize false alarms, and seamless integration with popular surveillance software like iSpy and Agent DVR․
ONVIF compatibility ensures interoperability with a wide range of network video recorders (NVRs), while RTSP streaming allows for flexible video delivery․ Furthermore, select models offer AI-powered detection, distinguishing between people, vehicles, and other objects for enhanced security․ The TopVision mobile app provides convenient remote access, enabling live viewing and control from anywhere․ These features combine to deliver a powerful, versatile, and user-friendly security solution․
Initial Setup & Installation
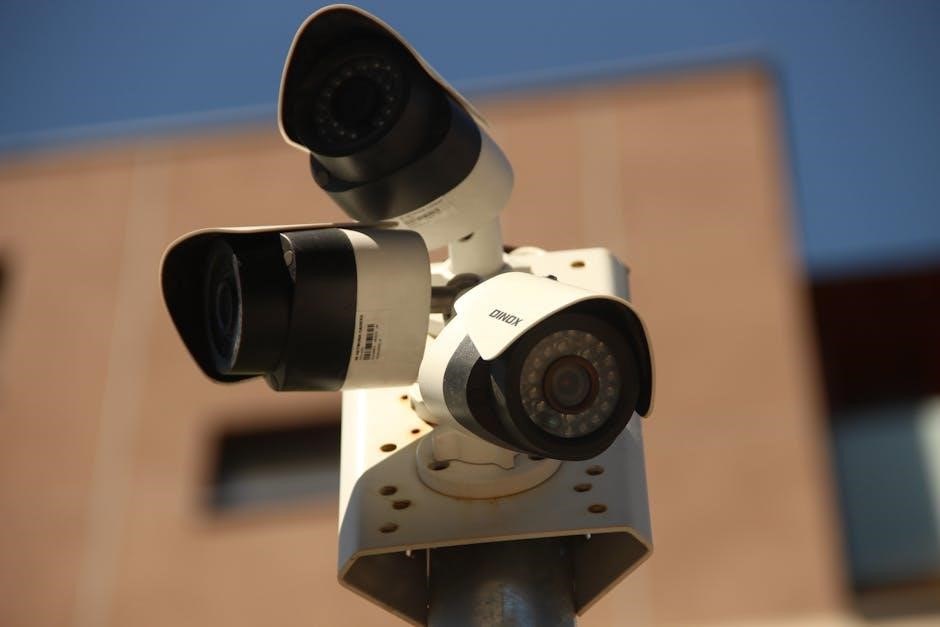
Before commencing installation, carefully unpack your TopVision camera and verify all components are present․ Choose a suitable mounting location, considering power source accessibility and desired field of view․ Securely mount the camera using the provided hardware, ensuring a stable and vibration-free installation․
Connect the camera to a power source and network connection – either via Ethernet cable for a wired connection or prepare for wireless setup․ Download and install the TopVision mobile app or compatible surveillance software (iSpy, Agent DVR) on your computer or mobile device․ The software often includes a dedicated wizard to simplify the setup process, guiding you through initial configuration and camera discovery․ Proper planning and careful execution are crucial for a successful installation․
Powering On and Basic Configuration
Once physically installed and connected to power, the TopVision camera will initiate its startup sequence․ Allow sufficient time for the camera to boot up completely – typically indicated by a stable power LED․ Access the camera’s configuration interface through your web browser using the camera’s default IP address (refer to the included documentation for this address)․
The initial configuration will prompt you to set a strong, unique administrator password – do not use the default credentials․ Configure basic settings such as time zone, date, and network parameters․ Explore the initial setup wizard within the software or app to streamline this process․ Verify the camera’s firmware is up-to-date for optimal performance and security;
Network Connectivity: Wired vs․ Wireless
TopVision cameras offer both wired (Ethernet) and wireless (Wi-Fi) connectivity options, each with distinct advantages․ Wired connections provide a more stable and reliable network link, minimizing potential interference and ensuring consistent video streaming․ This is ideal for critical surveillance areas․
Wireless connectivity offers greater flexibility in camera placement, eliminating the need for extensive cabling․ However, Wi-Fi performance can be affected by distance from the router, obstacles, and network congestion; Ensure a strong Wi-Fi signal strength for optimal wireless operation․ Consider using a Wi-Fi extender if necessary․ The choice depends on your specific installation environment and requirements․
Connecting to Wi-Fi: Step-by-Step Instructions
To connect your TopVision camera to Wi-Fi, first, power on the camera and ensure it’s in pairing mode (refer to the ‘Powering On’ section)․ Open the TopVision mobile app and add a new device․ The app will guide you through the Wi-Fi setup process․
Select your Wi-Fi network from the list and enter the correct password․ Double-check the password for accuracy, as incorrect credentials are a common issue․ The camera will attempt to connect to the network․ A successful connection is usually indicated by a solid Wi-Fi indicator light on the camera․ If connection fails, try moving the camera closer to the router or restarting both the camera and router․
Accessing the Live View
Once your TopVision camera is connected to the network, accessing the live view is straightforward․ Open the TopVision mobile app on your smartphone or tablet․ Locate your camera within the device list and tap on its icon․ This will initiate the live stream, displaying real-time footage from your camera directly on your device’s screen․
Alternatively, you can access the live view through compatible surveillance software like iSpy or Agent DVR․ These platforms offer advanced features like recording and motion detection․ Ensure your software is properly configured with the camera’s RTSP stream or ONVIF settings for seamless integration and viewing․ Enjoy remote monitoring capabilities from anywhere with an internet connection․
Using the TopVision Mobile App
The TopVision mobile app is central to managing your security system․ Download it from your device’s app store and create an account․ After logging in, the app will guide you through adding your camera, typically by scanning a QR code or manually entering the device’s serial number․
The app provides access to the live view, playback recorded footage, adjust camera settings, and receive motion detection alerts․ Customize notification preferences to suit your needs․ Explore features like two-way audio (if supported by your camera model) for remote communication․ Regularly check for app updates to ensure optimal performance and access to the latest features․
Camera Settings & Customization
Accessing camera settings allows for tailored surveillance․ Within the TopVision app or web interface, navigate to the device settings․ Here, you can adjust parameters like image brightness, contrast, and saturation to optimize video quality for your environment․ Configure recording schedules to specify when the camera should record, conserving storage space․
Customize motion detection zones to focus on specific areas, reducing false alarms․ Adjust the sensitivity level to fine-tune detection accuracy․ Explore advanced settings like privacy masking to block out sensitive areas from recording․ Regularly review and adjust these settings to maintain optimal performance and ensure your security system meets your evolving needs․
Motion Detection Configuration
TopVision cameras offer robust motion detection capabilities․ Access the motion detection settings through the camera’s web interface or mobile app․ Define specific zones within the camera’s field of view where motion will be monitored, minimizing false alerts from irrelevant activity like trees swaying; Adjust the sensitivity level; higher sensitivity detects smaller movements, while lower sensitivity reduces false positives․
Configure recording options triggered by motion, such as continuous recording, scheduled recording, or event-triggered recording․ Utilize the app to receive instant push notifications when motion is detected․ Experiment with different settings to find the optimal balance between sensitivity and accuracy for your specific environment and security needs․
Adjusting Image Quality & Resolution
TopVision cameras allow for flexible image quality and resolution adjustments․ Access these settings via the camera’s web interface or the mobile application․ Higher resolutions (e․g․, 1080p, 4K) provide sharper, more detailed images, but require more storage space and bandwidth․ Lower resolutions consume less bandwidth and storage, suitable for less critical areas․
Adjust brightness, contrast, and saturation to optimize image clarity based on lighting conditions․ Enable Wide Dynamic Range (WDR) to balance bright and dark areas in high-contrast scenes․ Experiment with different settings to achieve the best possible image quality for your specific environment, balancing detail with storage and bandwidth considerations․
Understanding ONVIF Compatibility
ONVIF (Open Network Video Interface Forum) is a global standard ensuring interoperability between IP-based security products․ TopVision cameras support ONVIF, allowing seamless integration with a wide range of Network Video Recorders (NVRs) and video management software (VMS) from different manufacturers․
This compatibility simplifies setup and avoids vendor lock-in․ To utilize ONVIF, ensure your NVR or VMS supports the ONVIF protocol․ You’ll typically need the camera’s ONVIF port (usually 80) and credentials․ iSpy and Agent DVR specifically highlight excellent ONVIF support for TopVision cameras, offering easy configuration and advanced features․ Utilizing ONVIF expands your surveillance system’s flexibility and scalability․
Utilizing RTSP Streaming
RTSP (Real Time Streaming Protocol) enables direct access to the video stream from your TopVision camera․ This is particularly useful for applications beyond standard NVRs, such as custom software or platforms requiring direct video feed integration․ TopVision cameras offer RTSP streaming, providing a flexible alternative to ONVIF for accessing live video․
To access the RTSP stream, you’ll need the camera’s RTSP URL, which typically follows a specific format including the camera’s IP address, port, and stream identifier․ iSpyconnect․com emphasizes the ease of streaming live video via RTSP with TopVision cameras․ This method allows for versatile connection options and integration with various surveillance solutions, enhancing system customization․
Advanced Features: AI Detection (People, Vehicles)
TopVision cameras boast advanced AI detection capabilities, significantly enhancing their security functionality․ This feature goes beyond simple motion detection, intelligently identifying specific objects like people and vehicles, reducing false alarms triggered by irrelevant movements – such as trees swaying or animals passing by․
Agent DVR, a compatible software solution, unlocks the full potential of this AI detection․ It allows for effortless installation and real-time detection of these objects, offering a user-friendly interface accessible on any device․ This advanced system supports an unlimited number of cameras and simplifies remote access without complex port forwarding configurations․ Agent DVR provides a powerful and secure monitoring solution for your property․
Integrating with Agent DVR
Agent DVR offers seamless integration with TopVision security cameras, providing a robust and feature-rich surveillance solution․ Utilizing a dedicated wizard specifically tailored for TopVision models, the setup process is remarkably simplified, ensuring a quick and hassle-free experience․ This integration unlocks advanced functionalities, including real-time detection of people, vehicles, and other objects powered by AI technology․
Agent DVR is a free surveillance software that supports unlimited cameras and offers simplified remote access without the need for port forwarding․ It’s an efficient way to configure your TopVision cameras, offering a secure and reliable monitoring system for both home and office environments․ Explore the power of Agent DVR for enhanced security․
Troubleshooting Common Issues
Encountering problems with your TopVision camera? This section addresses frequent issues and provides solutions․ Common problems include connection difficulties, often stemming from network configurations or incorrect credentials․ Motion detection errors can occur due to sensitivity settings or obstructions in the camera’s field of view․ If you experience a 403 error, as sometimes reported, it may indicate a security check initiated by Cloudflare, requiring a brief wait or browser adjustments․
Ensure your browser supports images, cookies, and JavaScript for optimal functionality․ Regularly check firmware updates, as these often contain bug fixes and performance improvements․ If issues persist, consult the warranty information for support options․
Resolving Connection Problems
Difficulty connecting your TopVision camera? Begin by verifying your network connection and ensuring the camera is within Wi-Fi range․ Double-check the entered Wi-Fi password and network name․ A common issue involves browser compatibility; confirm JavaScript, images, and cookies are enabled․ If encountering a Cloudflare error (like a 403 status), it suggests a security check – try again later or adjust browser settings․
For wired connections, inspect the Ethernet cable․ Consider using the iSpy or Agent DVR software, which often simplifies setup and offers robust connection management․ If problems persist, a factory reset might be necessary, but remember this will erase custom settings․
Addressing Motion Detection Errors
Experiencing false alarms or missed motion events with your TopVision camera? Begin by adjusting the motion detection sensitivity within the camera settings․ Reduce sensitivity to minimize triggers from minor movements like insects or foliage․ Conversely, increase it for broader coverage, but be prepared for more alerts․
Utilize the advanced AI detection features available through Agent DVR to differentiate between people, vehicles, and other objects, significantly reducing false positives․ Ensure the detection zones are accurately configured to focus on relevant areas․ Regularly review recorded events to fine-tune settings and optimize performance for your specific environment․
Security Best Practices
Protecting your TopVision security system begins with strong password management․ Immediately change the default username and password upon initial setup to a unique, complex combination of letters, numbers, and symbols․ Enable two-factor authentication (2FA) whenever possible for an added layer of security, requiring a secondary verification method․
Regularly update your camera’s firmware to patch security vulnerabilities and ensure optimal performance․ Limit network access to your cameras, and consider using a separate, dedicated network for surveillance devices․ Be cautious of phishing attempts and only download software from trusted sources like the official TopVision website or Agent DVR․
Changing Default Passwords
Prioritizing security, immediately change the default password on your TopVision camera․ Default credentials are publicly known, creating a significant vulnerability․ Access your camera’s settings via the web interface or mobile app․ Navigate to the ‘User Management’ or ‘System Settings’ section – the exact location varies by model․
Create a strong, unique password consisting of at least , incorporating a mix of uppercase and lowercase letters, numbers, and symbols․ Avoid using easily guessable information like birthdays or pet names․ Record your new password securely, and consider using a password manager․ Regularly update your password for enhanced protection against unauthorized access․
Firmware Updates & Maintenance
Regular firmware updates are crucial for maintaining optimal performance and security of your TopVision camera․ Manufacturers release updates to address vulnerabilities, improve functionality, and enhance compatibility․ Check for updates periodically through the camera’s web interface or the TopVision mobile app – typically found in ‘System Settings’ or ‘Device Information․’
Before updating, carefully read the release notes to understand the changes and potential impacts․ Avoid interrupting the update process, as this could damage the camera’s firmware․ Routine maintenance includes cleaning the camera lens with a soft, dry cloth and inspecting cables for damage․ Proper care extends the lifespan and reliability of your TopVision security system․
TopVision Camera Specifications
TopVision cameras offer a range of specifications depending on the model․ Common features include image resolution (typically 1080p or 4K), viewing angle (ranging from 90 to 120 degrees), and night vision capabilities utilizing infrared (IR) LEDs with a range up to 30-50 feet․
Connectivity options generally include Wi-Fi (802․11 b/g/n) and Ethernet ports․ Power requirements are usually 12V DC․ Many models support microSD card storage (up to 128GB) for local recording․ Operating temperatures typically range from -4°F to 140°F (-20°C to 60°C)․ Specific details, including compression formats (H․264/H․265) and weatherproof ratings (IP66/IP67), are available in the individual product datasheets․
Warranty Information & Support
TopVision offers a standard one-year limited warranty covering defects in materials and workmanship from the date of purchase․ This warranty does not cover damage resulting from misuse, accidents, or unauthorized modifications․ Proof of purchase is required for all warranty claims․
For technical support, users can access the TopVision website for FAQs, troubleshooting guides, and downloadable resources․ Customer support is available via email and online chat during business hours․ Additionally, the iSpyConnect community forum provides a platform for users to share experiences and seek assistance․ Detailed contact information and warranty claim procedures can be found on the official TopVision website․